
latest
habitat tv

Say goodbye to the morning scramble for keys, coats and sunglasses and hello to this… see this and more videos
blog

Restoring memories: A bath with a colourful new life
Within a heritage-listed homestead, amidst the serene beauty of nature, lay a unique piece of… more
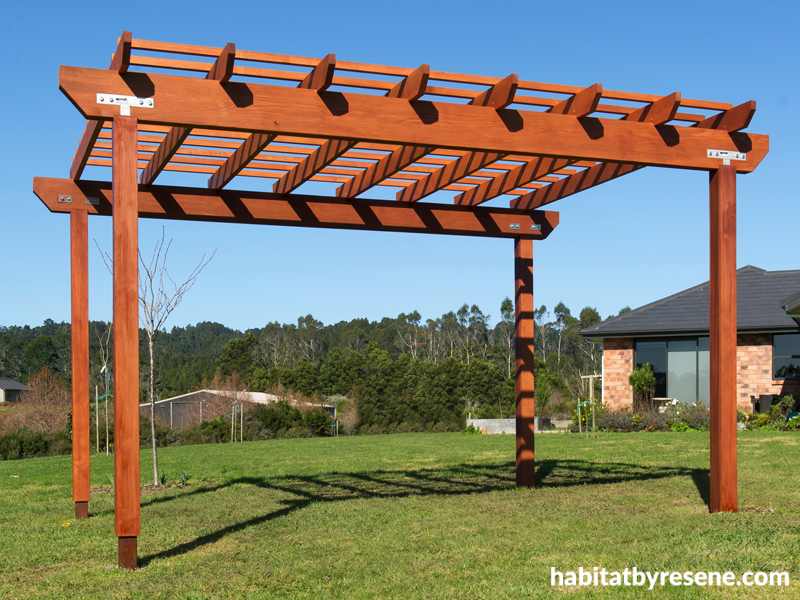
DIY: Build a pergola
04 Jul 2017
Build a pergola in your backyard, and then sit back and enjoy…
You will need
Tools and equipment: Electric drill, extension lead with RCD protection, post hole borer and auger bit, builder’s level, 2 1.8m step ladders, belt sander, skill saw, compound sliding mitre saw, electric router, cordless drill, safety goggles and ear muffs.
Materials: Four 100mm x 100mm dressed pine H4 treated posts 3m long, two 250mm x 100mm dressed cedar beams 4.6m long, eight 150mm x 50mm dressed cedar rafters each 3.6m long, eleven 50mm x 50mm dressed cedar battens 4m long, eight 90mm x 18mm dressed cedar facing boards 2.1m long, eight 124mm x 18mm dressed cedar facing boards 2.1m long, four stainless steel T brackets, stainless steel bolts and washers, stainless steel 75mm screws, rapid set concrete, sandpaper, 4 litres of Resene Woodsman Cedar stain, paint brush.
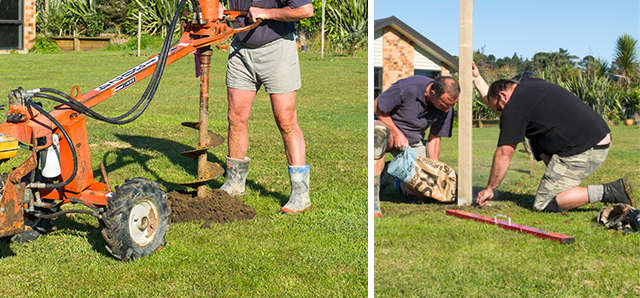
Step 1: Decide on the size and siting of the pergola. Ours is 3m x 4m. Dig holes with the posthole borer, and set the pine posts 900mm into the ground. Check the levels, and pour the concrete into the holes around the posts. Leave to set.
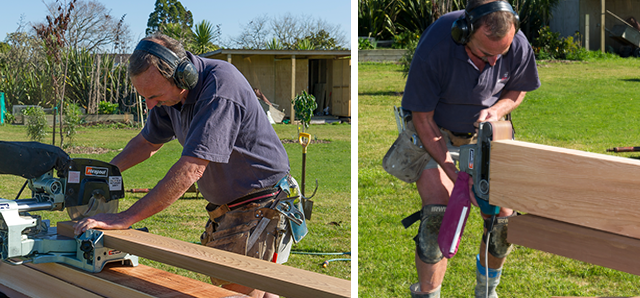
Step 2: Cut the top of the poles off level. Cut angles if desired onto the ends of the two beams with the skill saw, and finish off with the belt sander. Using the router, house the T brackets into the beams until flush. Cut angles if desired, onto the ends of the rafters with the compound sliding saw, and finish off with the belt sander.
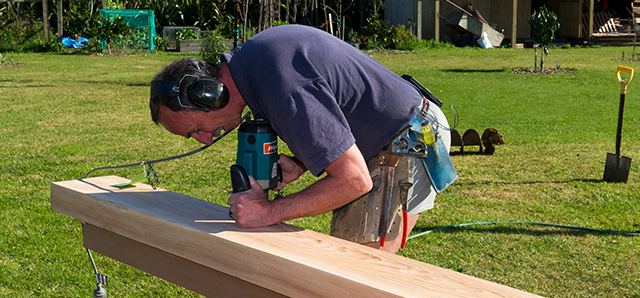
Step 3: Cut notches out of the rafters with the router, to slot over the beams. Pre-stain the cedar with one coat – this will make it easier later on.
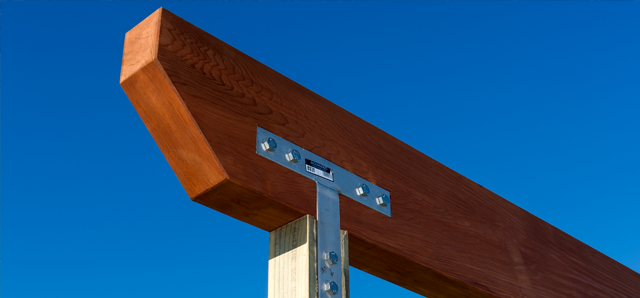
Step 4: Lift the beams into place, drill and bolt them to the top of the posts.
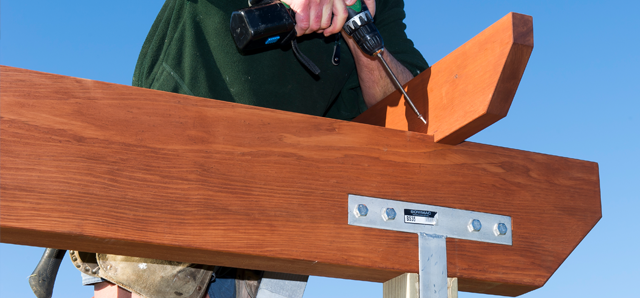
Step 5: Space the rafters evenly along the beam, slot and screw each one into place. Space the battens evenly on top of the rafters. Screw in place.
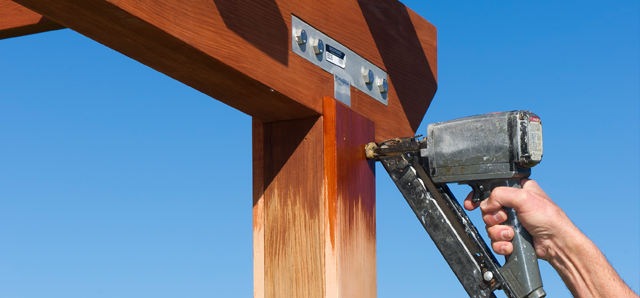
Step 6: You can simply stain the pine posts but we’ve chosen to cover them with cedar. Measure and cut the cedar facing boards to fit. Nail in place and stain.
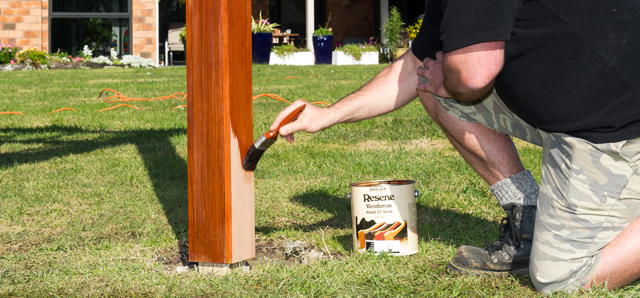
Step 7: Apply a second coat of Resene Woodsman stain to the entire structure.
Published: 04 Jul 2017
more inspiration

Show your support this ANZAC Day with this DIY wreath
Anzac Day is a national day of remembrance in New… more

Sunny side up: Bookends for any weather
Brighten up your bookshelf and organise your books at the… more

A roar-some dish: DIY animal plates
Impress your guests with these DIY animal plates! The Resene… more

Glowing zoofari: Make your own animal themed lamp
Here’s a great DIY to do with the kids over… more

Hop into Easter with these fun DIY projects for the whole family
With Easter looming, we want to bring you more fun… more


 look book