
latest
habitat tv

Say goodbye to the morning scramble for keys, coats and sunglasses and hello to this… see this and more videos
blog

Artist Justine McAllister has been busy and her recent mural for Wild Things grocer in… more
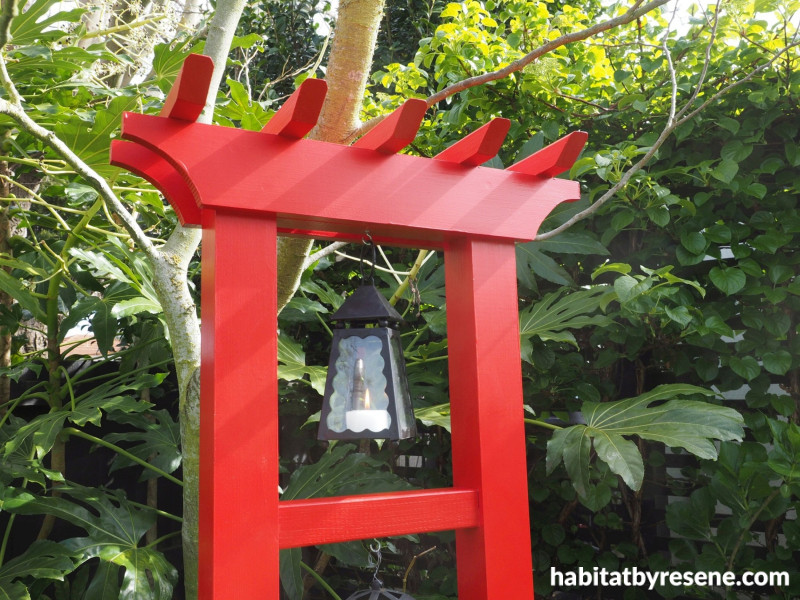
A welcome light for your backyard: How to make your own DIY Chinese New Year lantern stand
25 Jan 2023
It’s not too ‘light’ to celebrate the Chinese New Year. This DIY lantern stand will help brighten up your backyard just in time. Since the very first paper lanterns were made over 2000 thousand years ago, they've become ubiquitous in Chinese culture and around the world, particularly in times of celebration. They represent family gathering and a brighter future, and can also symbolise people letting go of the past and creating new goals for the year ahead.
The colour of the new year is almost always red to symbolise good fortune, and this red lantern stand will stand out amongst your garden greenery. Try to find some red lanterns to match, but if you can’t you can always paint over the frame in a different colour.
What you will need:
- Four 1.8m lengths of treated pine 68mm x 34mm (upright posts)
- 1m of treated pine 45mm x 45mm (horizontal bars the lanterns hang from)
- 2m of treated pine 90mm x 18mm (horizontal top header)
- 4m of treated pine 40mm x 30mm (top bars)
- Saw
- Electric drill and screws
- Wood glue
- Jig saw
- Wood filler
- Sandpaper
- Resene Quick Dry
- Paintbrush
- 3 cup hooks
- 3 lanterns
- Resene Lustacryl paint, or a Resene testpot, in a red shade of your choice. Fleur used Resene Bullseye.

Step 1: Start by cutting your upright posts to length. Fleur’s are 1.8m long. You can glue and screw two 68mm x 34mm together to form a square post. Cut the three horizontal bars to length. Fleur’s are 26cm long. Prime all the wood with a coat of Resene Quick Dry.

Step 2: Measure your lanterns and work out how far apart you want your horizontal bars so the lanterns can fit between them. Attach these bars between the two posts and secure with a couple of screws. Countersink your screws so that you will get a smooth finish at the end.

Step 3: Cut your header boards to length. Fleur’s are 60cm long. You can use a plate to trace a curve at each end and cut this out with a jig saw. Prime the header boards with some more Resene Quick Dry and once this has dried, glue and screw the boards in place at the top of the stand.

Step 4: The last bit of construction is to cut the top bars to length, 27cm long with about a 50-degree cut on each end. Space these out equally across the top of the header and screw in place.

Step 5: Fill all the screw holes with wood filler. Once dry, sand it smooth and paint over the filler with more Resene Quick Dry. Finish the lantern stand by painting it with two coats of your chosen red allowing dry time between coats. Fleur used Resene Bullseye. Screw in a small cup hook to the underside of each of the three horizontal bars and hang the lanterns up.

Step 6: Dig two holes in your garden about 60cm deep, place the lantern stand in the holes (use a level to make sure it stands straight) and stamp the dirt back in around the posts firmly. Light your lanterns, ready to celebrate the Chinese New Year.
project and images Fleur Thorpe
Published: 25 Jan 2023
more inspiration

Hold that thought: DIY note and phone holder
Now here is a handy DIY to try. These note… more

Two fun DIY boredom busters for the school holidays
Wherever you’re at in the school holidays, and however many… more

Woodn’t this look lovely on the wall? Try this DIY cube art!
Are your walls feeling a bit bare? You don’t have… more

The defining colours for June and July
The Color Marketing Group (CMG) are back with their latest… more

You’ll be a shelf made genius after this DIY!
If you’re running out of space, or just want an… more


 look book